The key to filing a water damage claim without a premium hike isn’t just about reporting the incident, but about strategically proving you are a responsible, low-risk homeowner.
- Your insurance policy is designed to cover “sudden and accidental” damage, not gradual wear and tear. Your documentation must build a clear narrative supporting this.
- Immediate, professional mitigation is non-negotiable. It stops further damage and signals to your insurer that you are actively managing the risk.
Recommendation: Before ever making a call, shift your mindset from “reporting a problem” to “presenting a case.” Your goal is to demonstrate proactive control over the situation.
The sound is unmistakable: a faint dripping that grows into a steady trickle, or the sudden gush of water from a burst pipe. For any homeowner, it’s a moment of sheer panic. Water damage is one of the most common and stressful home insurance claims, bringing with it the immediate worry of property loss and the lingering fear of a significant insurance premium increase. The conventional wisdom is to call your insurance company immediately and start the cleanup. But this reactive approach often overlooks a crucial strategic element.
Most homeowners believe that filing a claim is a straightforward process of reporting damage and waiting for a check. However, insurers operate on risk assessment. How you handle the first few hours and days of a water incident profoundly impacts how they perceive your risk profile. A poorly managed claim can flag you as a higher liability, leading directly to the premium hike you dread. The real challenge isn’t just stopping the leak; it’s about building a powerful narrative of diligence and control from the very first moment.
But what if the key wasn’t simply to report the damage, but to present a meticulously documented, professionally mitigated case file to your insurer? This article will shift your perspective. We will move beyond the generic advice and delve into the expert strategies that turn a stressful water damage event into an opportunity to prove you are a responsible partner to your insurer. You will learn not just what to do, but *why* you are doing it, and how each step contributes to protecting your property and your policy.
To help you navigate this complex process, we’ve broken down the essential steps and concepts you need to master. This guide provides a clear roadmap, from understanding your policy’s fine print to documenting evidence like a professional, ensuring you can manage any water-related claim with confidence and strategy.
Table of Contents: Navigating Your Water Damage Claim Strategically
- Why Slow Leaks Are Often Excluded While Burst Pipes Are Covered?
- How to Photograph Water Damage Evidence Before the Cleanup Crew Arrives?
- Sewer Backup vs. Overland Water: Which Endorsement is Critical for Your Basement?
- The Heating Mistake That Causes Frozen Pipes in 40% of Vacant Homes
- What to Do in the First Hour of a Flood to Save Your Flooring?
- The Gutter Cleaning Oversight That Leads to $5,000 in Facade Damage
- How to Use ‘Additional Living Expenses’ Coverage to Stay Afloat During Repairs?
- From First Hour to Long-Term Strategy: Securing Your Insurability Profile
Why Slow Leaks Are Often Excluded While Burst Pipes Are Covered?
The most critical distinction in any water damage policy is the concept of “sudden and accidental” versus “gradual.” Insurers are in the business of covering unforeseen events, like a pipe that bursts unexpectedly. They are not in the business of paying for damage caused by a homeowner’s failure to perform routine maintenance. A slow, dripping leak under a sink that has been ignored for months is considered a maintenance issue, not an accident. The resulting mold, rot, and structural damage are seen as preventable and are therefore almost always excluded from standard policies.
This is why your initial actions and documentation are so vital. You must build a clear “burden of proof” that demonstrates the damage was indeed sudden. A burst pipe is obvious, but a failed water heater or a washing machine hose that splits can be more ambiguous. The insurer will look for evidence that the damage occurred over a short period and that you acted immediately to mitigate it. Without this proof, they may argue the problem was long-standing, leaving you with a denied claim and a significant repair bill. With the average insurance payout for water damage claims being $12,514, failing to establish this distinction can be a costly mistake.
Your goal is to construct an undeniable timeline. This involves more than just calling a plumber; it requires gathering specific evidence that supports your narrative of a sudden event. This file will become the foundation of your claim, transforming it from a simple request into a well-supported case that is difficult for an insurer to dispute.
Your Action Plan: Building the ‘Burden of Proof’ File
- Obtain a Plumber’s Report: Insist on a detailed report that pinpoints the specific component failure and explicitly uses terms like “sudden rupture” or “catastrophic failure.”
- Document Maintenance History: Gather receipts from past plumbing inspections or related services within the last 2 years to show you have been proactive.
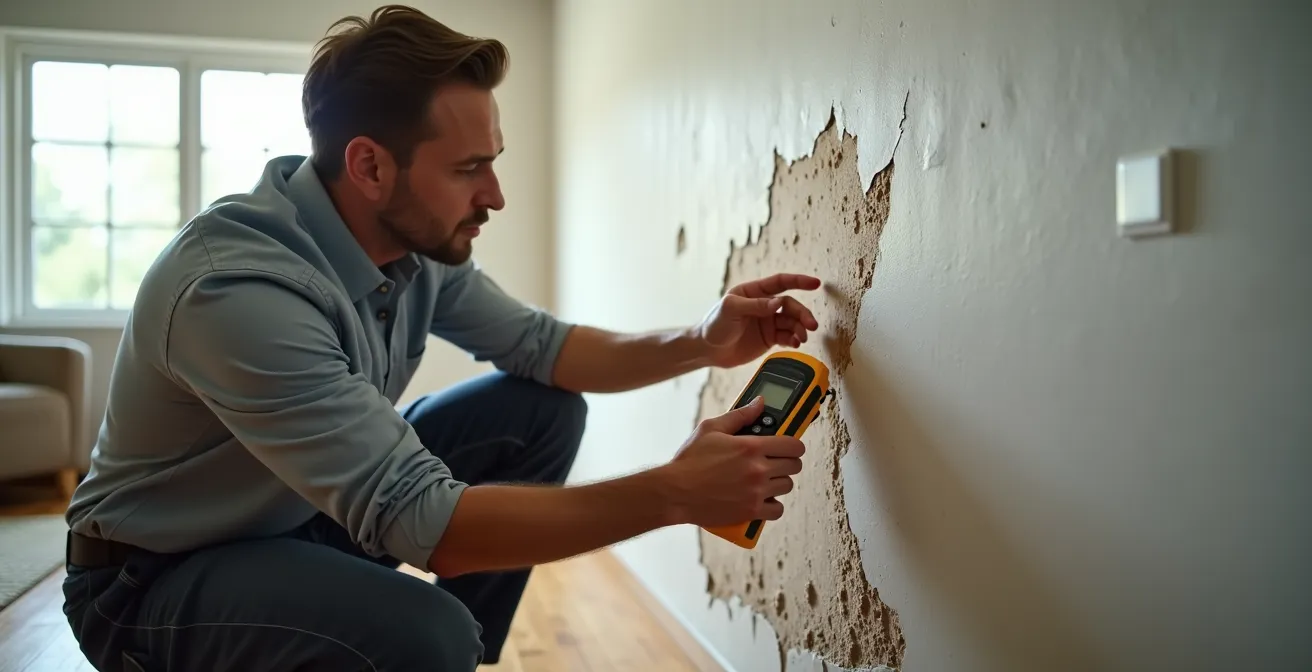
- Measure and Record Moisture: If possible, use a moisture meter immediately after discovery to take readings. This data establishes a baseline and helps prove the water intrusion is recent.
- Photograph Surrounding Areas: Take photos of nearby pipes, fixtures, and walls that are in good condition to counter any claims of general neglect or poor maintenance.
- Collect Preventive Upgrade Evidence: If you’ve recently replaced old valves, hoses, or other components, include those receipts. This demonstrates a history of responsible ownership.
How to Photograph Water Damage Evidence Before the Cleanup Crew Arrives?
Before you move a single piece of furniture or call a water mitigation company, your first job is to become a forensic photographer. The photos and videos you take in the initial moments are your most powerful evidence. They establish the origin and extent of the damage, creating a “claim narrative” that is crucial for a successful outcome. Do not rely on the adjuster’s photos; they are working for the insurance company. You need your own, undeniable record.
Your documentation should tell a story. Start with a wide shot of the entire affected area to establish context. Then, move closer to capture medium shots of damaged items like flooring, walls, and furniture. Finally, take detailed close-up shots of the source of the leak (the burst pipe, the failed connection) and the most severe points of damage. Photograph everything: the high-water mark on the walls, warped floorboards, and damaged personal belongings. It’s better to have 100 photos you don’t need than to be missing the one that proves your case.
This detailed visual evidence serves a dual purpose. It not only substantiates the value of your damaged property but also helps prove the “sudden and accidental” nature of the event. For example, photos showing clean water from a supply line burst are very different from photos of discolored, moldy areas indicative of a long-term leak.
This process is about capturing the raw, unaltered state of the scene. The illustration below highlights the mindset of thorough documentation, capturing the full scope before any remediation begins.
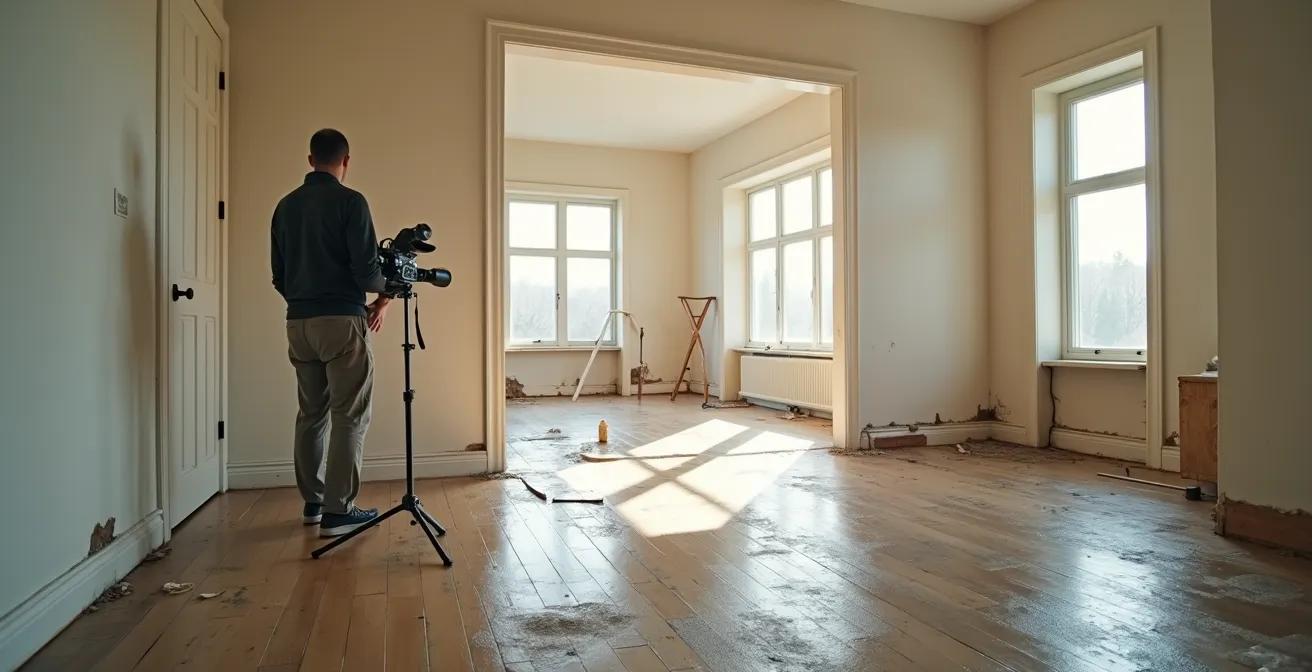
As you can see, capturing both the macro view of the room and the micro details of the damage is essential. Don’t forget to use your smartphone’s video function to do a slow walk-through of the area, narrating what you are seeing. This adds another layer of context and credibility to your documentation.
Case Study: How Photo Metadata Can Win a Claim
Insurance adjusters are increasingly using digital photo metadata to verify claim timelines. In one recent case, a homeowner submitted a claim for significant water damage. The insurer was skeptical, suggesting the damage might have occurred while the homeowner was on a long vacation, potentially voiding the claim. However, the homeowner had taken dozens of unedited photos with their smartphone immediately upon discovering the leak. The intact EXIF metadata on these photos showed timestamps from the exact date and time of discovery. This digital footprint proved they had acted quickly to report and mitigate the damage, which was crucial in validating the “sudden and accidental” nature of the incident and securing a full payout.
Sewer Backup vs. Overland Water: Which Endorsement is Critical for Your Basement?
One of the most shocking discoveries for homeowners dealing with a flooded basement is that their standard policy likely covers none of it. A standard homeowner’s policy is designed to cover water damage originating from *within* the home’s plumbing system (like a burst pipe). It explicitly excludes damage from water that enters from the outside or backs up through drains. This is a critical gap in coverage, especially considering that industry research shows that 98% of basements will experience some form of water damage.
To protect yourself, you need specific policy add-ons, known as endorsements. The two most important ones are Sewer Backup Coverage and Overland Water Coverage. They are not the same, and having the wrong one can be a costly mistake.
- Sewer Backup Coverage: This protects you if water backs up into your home through your drains or sewer line. This can be caused by a blockage in your home’s pipes or an overflow from the municipal sewer system.
- Overland Water Coverage: This covers damage from fresh water that enters your home from the surface, such as heavy rain overflowing window wells, spring melt-off, or overflow from a nearby lake or river.
Understanding which endorsement you need—or if you need both—is paramount. A sump pump failure causing a backup is a sewer backup issue. A torrential downpour that floods your yard and seeps into your basement is an overland water issue. The following table breaks down these scenarios to clarify what is, and isn’t, typically covered.
| Event Type | Standard Policy | Sewer Backup Endorsement | Overland Water Coverage |
|---|---|---|---|
| Water backing up through drains | Not Covered | Covered | Not Covered |
| Surface water entering basement | Not Covered | Not Covered | Covered |
| Sump pump mechanical failure | Not Covered | Sometimes Covered | Not Covered |
| Municipal sewer overflow | Not Covered | Covered | Not Covered |
| Groundwater seepage | Not Covered | Not Covered | Sometimes Covered |
The Heating Mistake That Causes Frozen Pipes in 40% of Vacant Homes
When leaving a home vacant during winter, many homeowners make a critical and costly mistake: they turn the heating off completely to save on energy bills. This is the single most common cause of frozen and burst pipes, an issue that accounts for a huge percentage of winter water damage claims. An unheated home allows temperatures in wall cavities and basements to drop below freezing, causing water in the pipes to expand and rupture the plumbing. When the temperature rises, the ice thaws, and thousands of gallons of water can flood the property.
Insurers are well aware of this risk. If you file a claim for a burst pipe in a vacant home, one of the first questions will be: “What was the thermostat set to?” If you can’t prove you took reasonable steps to heat the property, your claim can be denied on the grounds of negligence. The industry standard for “reasonable heat” is typically maintaining a minimum indoor temperature of 55°F (13°C).
Merely stating you left the heat on is not enough. You need to create a ‘Winterizing Defense File’ to prove your diligence. This is especially true if you are away for an extended period (usually 30 days or more), as many policies have specific vacancy clauses that you must adhere to.
To protect your home and your insurance coverage, follow these documentation steps before you leave:
- Photograph Thermostat Settings: Take a clear, timestamped photo of your thermostat showing it is set to at least 55°F.
- Keep HVAC Service Receipts: A receipt from a pre-winter HVAC inspection shows you ensured the heating system was in good working order.
- Use Smart Thermostat Logs: If you have a smart thermostat, its temperature logs are irrefutable proof of consistent heating patterns while you were away.
- Document House-Sitter Visits: If someone is checking on your home, keep written logs or emails with dated check-in confirmations.
- Check Your Vacancy Clause: If you’ll be gone for more than a month, contact your insurer. You may need a special vacancy permit to maintain coverage.
What to Do in the First Hour of a Flood to Save Your Flooring?
When water is spreading across your floor, the clock starts ticking immediately. Your actions in the first 60 minutes can mean the difference between saving your flooring and a complete, costly replacement. More importantly, they demonstrate to your insurer that you are taking your duty to “mitigate damages” seriously. This is a standard clause in every policy, requiring you to take reasonable steps to prevent the damage from getting worse. Failure to do so can reduce your claim payout or even lead to a denial.
The primary enemy after the water itself is time. According to FEMA guidelines, mold can begin to develop within 24-48 hours of water exposure. This means that every minute of delay increases the risk of secondary damage, which may not be covered. Your first priorities are to stop the water source, protect your belongings, and begin removing water.
Here is your emergency action plan for the first hour:
- Shut Off the Main Water Valve: Locate and turn off your home’s main water supply to stop the flow immediately. If the flooding is from an appliance, you can also shut off its local valve.
- Turn Off Electricity: If there is significant standing water, turn off the power to the affected area at the breaker box to prevent electrocution risk. Do not stand in water to do this.
- Move and Elevate Valuables: Quickly move furniture, electronics, rugs, and other valuable items to a dry area or elevate them on blocks.
- Begin Water Removal: Use a wet/dry vacuum, mops, and buckets to remove as much standing water as possible. For carpeting, blot with dry towels. The faster you remove the bulk of the water, the better the chance of saving the materials underneath.
- Call a Professional Mitigation Company: After taking these initial steps, call a certified water damage restoration company. They have industrial-grade equipment to extract water and dry the structure completely, which is your best defense against mold.
Case Study: The Smart Use of Mitigation Costs vs. a Full Claim
A homeowner experienced a washing machine hose burst, causing about $3,000 in damage to their laundry room floor. Their policy had a $1,000 deductible. Instead of filing a full claim, which would have put a claim on their record for a net payout of only $2,000, they took a strategic approach. They called a mitigation company and authorized only the emergency services (water extraction and structural drying), which cost $800. They submitted this mitigation bill to their insurance, which was covered without impacting their premium, as it showed they were preventing further damage. They then paid for the $2,200 in flooring repairs out-of-pocket, keeping their claims history clean and avoiding a potential premium increase.
The Gutter Cleaning Oversight That Leads to $5,000 in Facade Damage
While burst pipes get the most attention, one of the most common—and entirely preventable—sources of water damage comes from above: clogged gutters. It’s an easy chore to overlook, but the consequences can be severe. When gutters are filled with leaves and debris, rainwater has nowhere to go. It overflows, running down the facade of your home, seeping behind siding, and saturating the walls. This persistent moisture can lead to wood rot, peeling paint, foundation issues, and even mold growth inside your walls, often resulting in thousands of dollars in damage.
Like slow leaks, damage from clogged gutters is typically viewed by insurers as a maintenance issue. A claim for facade repair due to gutter overflow is likely to be denied because the root cause was a failure to perform basic upkeep. This problem is more widespread than many think; EPA data shows that American households waste 1 trillion gallons annually from various household leaks, and poorly maintained exteriors are a significant contributor.
The good news is that preventing this is straightforward, and documenting your prevention efforts can even help your insurance profile. By creating a ‘Proactive Maintenance File,’ you can demonstrate a consistent history of responsible homeownership. This can be beneficial during your annual policy renewal, as some agents may offer discounts or better terms for clients who can prove they actively reduce risk.
To build your file and protect your home’s exterior, implement these practices:
- Schedule Biannual Cleaning: Have your gutters professionally cleaned at least twice a year, typically in late spring and late fall. Keep every service receipt.
- Photograph Your Work: If you clean the gutters yourself, take timestamped “before” and “after” photos as proof of the completed work.
- Document Roof Inspections: An annual roof inspection can spot potential issues before they become major problems. Keep the professional assessment reports.
- Create a Maintenance Calendar: Use a simple calendar or app to log when you complete preventive tasks like gutter cleaning, sealing windows, and inspecting downspouts.
- Present Your File to Your Agent: At your next policy renewal, share your comprehensive maintenance file with your insurance agent. It highlights you as a low-risk client.
How to Use ‘Additional Living Expenses’ Coverage to Stay Afloat During Repairs?
When severe water damage makes your home uninhabitable, the immediate concern is “Where will my family live?” This is where Additional Living Expenses (ALE) coverage comes in. Also known as “Loss of Use,” ALE is a standard component of most homeowner’s policies designed to cover the extra costs you incur while displaced from your home during repairs. However, many homeowners either don’t know it exists or fail to maximize its benefits.
ALE is not a blank check. It covers the *difference* between your normal living expenses and your costs while displaced. For example, if your family normally spends $600 a month on groceries, but now you’re spending $1,500 on restaurant meals, ALE would cover the $900 difference. It can also cover hotel bills, temporary rental costs, extra mileage for a longer commute, laundry services, and even pet boarding fees.
The key to a successful ALE claim is meticulous record-keeping. You must save every single receipt. Insurers will require proof for every dollar you claim. It is crucial to understand how your insurer handles payments, as this can greatly affect your cash flow during a stressful time.
Case Study: Maximizing a $12,000 ALE Claim
A family was displaced for two months after a major water heater failure flooded their ground floor. They successfully claimed $12,000 in Additional Living Expenses by being incredibly organized. They used a detailed spreadsheet to track all displacement costs: hotel stays, the difference between restaurant meals and their normal grocery budget, the extra mileage from the hotel to their workplaces, pet boarding for their dog, and laundry service costs. By submitting this organized tracker with all corresponding receipts, they ensured no eligible expense was missed and received full reimbursement up to their policy limit.
ALE payments are typically handled in one of two ways: as a lump-sum settlement or through monthly reimbursement. Each has its pros and cons, and the best choice depends on the expected length of your displacement.
| Payment Method | Advantages | Disadvantages | Best For |
|---|---|---|---|
| Lump Sum Settlement | Immediate cash flow, No ongoing paperwork, Flexibility in spending | Risk of underestimation, No additional funds if costs exceed | Short-term displacement (under 3 months) |
| Monthly Reimbursement | Actual costs covered, Can adjust for longer displacement, No estimation risk | Requires detailed record-keeping, Delayed reimbursement, More paperwork | Long-term displacement (3+ months) |
Key Takeaways
- Proof is Everything: Your primary job is to build a “burden of proof” that your water damage was sudden and accidental, using photos, reports, and maintenance records.
- Prevention is Your Best Policy: Documenting routine maintenance on gutters and heating systems is not just good homeownership; it’s a key strategy to avoid claim denials and prove you are a low-risk client.
- Strategic Mitigation is Non-Negotiable: Acting immediately to stop and remove water is required by your policy and is the single best way to prevent secondary damage like mold.
From First Hour to Long-Term Strategy: Securing Your Insurability Profile
Navigating a water damage claim successfully is less about luck and more about strategy. As we have seen, every action you take—from the moment you discover the water to how you document your preventive maintenance—contributes to your overall “insurability profile.” This is the perception your insurer has of you as a risk. A homeowner who panics and simply reports a flood is a liability. A homeowner who documents meticulously, mitigates immediately, and understands their policy is a partner in risk management.
The principles outlined in this guide—distinguishing between sudden and gradual damage, creating a forensic-level claim narrative, and understanding the fine print of your endorsements—are not just for handling a crisis. They are part of a long-term strategy for responsible homeownership. By adopting this proactive mindset, you transform your relationship with your insurer. You are no longer just a policy number, but a client who actively works to protect your shared investment.
This approach gives you control in a situation that often feels uncontrollable. It empowers you to make strategic decisions, such as whether to pay for a small repair out-of-pocket to protect your claims-free history or how to present an ironclad case for a major loss. Ultimately, this diligence is what protects you from a denied claim and helps shield you from the dreaded premium hike that follows a poorly managed incident.
The next logical step is to apply this knowledge before a crisis occurs. Review your current insurance policy with this new strategic lens, identify any gaps in coverage like sewer backup or overland water, and begin building your proactive maintenance file today. This preparation is the best insurance you can have.